Self opening Box - STEM project
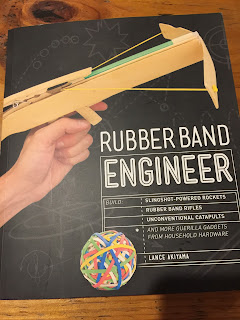
 I recently purchased this most amazing book. Rubber Band Engineer by Lance Akiyama. The purpose behind the purchase was to find some quality projects that had instructions and pictures to learn new techniques with construction.
I know you can find them on Pinterest, but many sites have great pictures but lack instructions or quality instructions. Wanting to explore construction with predesigned projects that worked I have found this book to be exactly what I needed.
The first project was an opening box using pneumatics. I enlisted the enthusiasm of a year 5 child to gage the difficulty of the task. During construction I was required to assist with measuring accurately, sourcing the glue gun and glue sticks and holding the duct tape.
While the box looks complicated it went together so well I found I am "Just as smart at a 5th Grader".
A visual procedure for the project. The box is made from 6 15cmx15cm squares of cardboard. These are then covered with coloured paper. Join the tubing to the 2 syringes. Ensure one syringe is pushed in, and one is pulled out.
The base and 2 sides are glued together and the first syringe is attached to the back panel of the box via the tubing at the base of the syringe. The syringe can't be attached to the box or it won't work.
Edges are hot glued together to form an open cube. The edges of each square are sealed together with duct tape. Don't glue the lid on. The lid is only attached via duct tape on one side so the box can open.


Comments
Post a Comment