Using a Lilypad for a first project
Create a Cushion with twinkling lights
This project uses the lilypad and circuit as a decorative feature and so it is sewed on the outside of the cushion. This will assist with changing the programming of the lights and replacing the battery. The cushion will be decorative and not washable.
You could do a similar project and hide the lilypad inside. Consider how will you change the battery.
You will need:
Fabric for your cushion - we made a 50cm cushion.
Conductive thread
Alligator clips or wire for each light
Needle
Embroidery hoop
Dress makers chalk
Sewing Instructions: https://www.sparkfun.com/tutorials/312
Download Arduino Software - https://www.arduino.cc/en/main/software
Program the Lilypad
There are many ways to construct code. This was a first attempt and an easy way to teach beginners about parts of a program. If you would like to propose an alternative method of coding this please do so in the comments via links or text, make sure you include commenting.
- Open the Arduino Software
- Click on File, New.
- Copy the code from https://www.arduino.cc/en/tutorial/fade
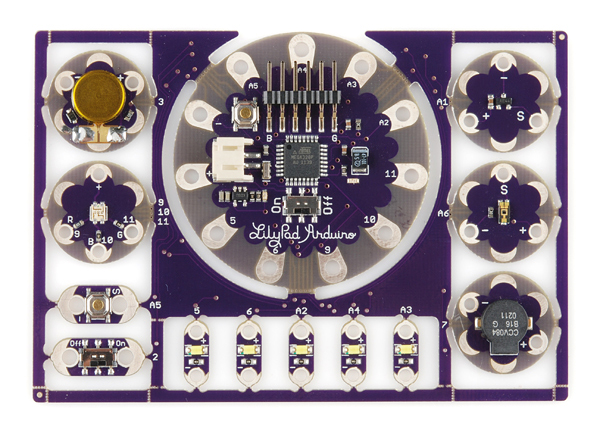
Instructions to sew in Lily Pad with 9 points. This project only uses 3. - Paste it into your Arduino Sketch.
- Modify the code to adapt it for 3 pins. This project uses pins 9, 10 and 11
- Modify the Code to make 3 lights fade using pins 9, 10 and 11 see below.
- Click on the tick to compile the program.
See troubleshooting if there is an error. - Plug the lilypad to the USB port.
- Click on Tools, Board, Lilypad Arduino (to select the correct hardware).
- Click on Tools, Port, USB (to select the correct port).
- Click on the horizontal arrow on the toolbar.
This will load the program onto the lilypad. - It should Upload Complete. If the program has no orange lines at the bottom of the screen it has been successful.
See trouble shooting if there is an error.
Troubleshooting
If there is error messages at the bottom
- Check the error message, missing ; or ,
- Check for incorrect capital letters.
- Check there are no spelling mistakes.
- Check for missing brackets
- Check the correct board is selected.
Click on Tools, Board, Lilypad Arduino (to select the correct hardware). - Check the correct port is selected.
Click on Tools, Port, USB (to select the correct port).
Final Project Code
/*Fade */
int brightness = 0; // how bright the LED is
int fadeAmount = 5; // how many points to fade the LED by
// the setup routine runs once when you press reset:
void setup() {
pinMode(9, OUTPUT);
pinMode(10, OUTPUT);
pinMode(11, OUTPUT);
}
// the loop routine runs over and over again forever:
void loop() {
// set the brightness of pin 9:
analogWrite(9, brightness);
analogWrite(10, brightness);
analogWrite(11, brightness);
// change the brightness for next time through the loop:
brightness = brightness + fadeAmount;
// reverse the direction of the fading at the ends of the fade:
if (brightness <= 0 || brightness >= 255) {
fadeAmount = -fadeAmount;
}
// wait for 30 milliseconds to see the dimming effect
delay(30);
}
Hook up the circuit to test the program
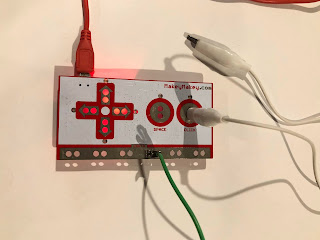
Before you sew the circuit on the fabric it is important to hook it up and test the circuit this project used alligator clips, you could use wire to test the circuit.
You will need to snap the lilypad and 3 LEDs out of the prototyping frame. do this carefully so you don't damage the components.
- Plug in the battery to the lilypad.
- Clip one alligator clip to pin 9, on the lilypad.
- Clip the other end to the positive end of an LED.
- Clip one alligator clip to pin 10, on the lilypad.
- Clip the other end to the positive end of an LED.
- Clip one alligator clip to pin 11, on the lilypad.
- Clip the other end to the positive end of an LED.
- Clip one alligator clip to the negative terminal on the lilypad.
- Clip the other end to the negative end of the LED on pin 11.
- Clip one alligator clip to the negative end on pin 11.
- Clip the other end to the negative end of the LED on pin 10.
- Clip one alligator clip to the negative end on pin 10.
- Clip the other end to the negative end of the LED on pin 9.
- Turn on the lilypad.
If it doesn't work, check the positions of the clips, they are big and bulky for the small lights, they may have come off. Then check your program again.
Once you have tested the circuit and the lights come on you are ready to sew.
Sew the Circuit
This project uses double thread to give more strength and more contact for the lights.
Each light is like spokes out from the lily pad to the positive terminal on the LED. Then you sew around the outside of the lights from the negative terminal on the lilypad to each negative point on each LED. You do not need to complete the circle there will be a gap between the last light and the lilypad, check the pictures in the sparkfun tutorial. (this may upset the OCD people but that is the way it is. If it upsets you too much you can complete the circuit using regular grey cotton to match the conductive thread.
BEWARE!!!
- Conductive thread tangles easily.
- You also want to ensure the thread is long enough to get to the next LED.
- You want to limit the number of ends and knots you have along the way as these increase the risk of the circuit breaking.
- Do NOT cross over the path of conductive thread. Each line of stitching must be clear of any other part of the circuit.
- Plan the location of your lights and lilypad.
- Plan the route the thread will take.
- Draw on the fabric with chalk if you need to - remember you can't wash it once the circuit is on.
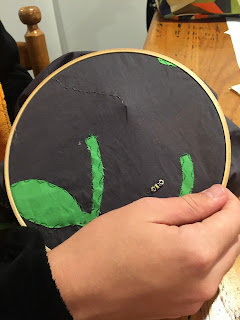
- Use the embroidery hoop to put tension on the fabric as you sew.
- Sew the lily pad on to the fabric with grey thread in the pins you won't be using to reduce movement.
- With conductive thread sew into pin 9. Loop through the circle 3 times.
- Using running stitch sew to the position of the first LED.
- Sew into the positive terminal of the first LED.
- With conductive thread sew into pin 10. Loop through the circle 3 times.
- Using running stitch sew to the position of the second LED.
- Sew into the positive terminal of the second LED.
- With conductive thread sew into pin 11. Loop through the circle 3 times.
- Using running stitch sew to the position of the third LED.
- Sew into the positive terminal of the third LED, 3 times.
- With conductive thread sew into the negative pin on the lilypad. Loop through the circle 3 times.
- Using running stitch sew to the negative terminal of the first LED.
- Using running stitch sew to the negative terminal of the second LED.
- Using running stitch sew to the negative terminal of the third LED.
- Ensure the battery is turned on.
- Turn on the lilypad.


Comments
Post a Comment